This post is the second in an 8 part series that I will write about implementing guided reading into your classroom.
Today, for my second post in this guided reading series, I will share my top six tips for implementing guided reading in your primary classroom. Let’s get started!
Today I will share my top six tips for implementing guided reading in your primary classroom at the start of a new school year.
Step 1: Assess your readers
There are many different reading level kits available. My school district has used the Fountas and Pinnell Leveling Kits for the past few years. We are required to formally assess our entire class in the fall, winter, and spring. In some years, we were lucky enough to have a substitute for a day and we were able to individually test our students. With budget cuts, we no longer have that luxury and we have to find time to assess all of our students in the first few weeks of school. Although this is by no means an easy task, I always look forward to reading and meeting with each individual student.
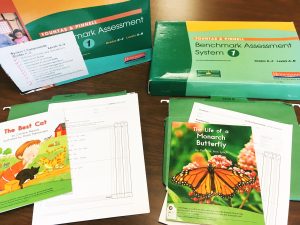
I learn SO much about their reading behaviors, their fluency, and their reading interests. I also use this one on one time to work with each reader to set a reading goal.
My students fill out their fall reading level on their reading progress chart. I hold onto this chart until the spring, where they fill in the spring column, documenting their growth as a reader.
You can download the chart in the picture above (for free) by clicking on the button below:
There are many other ways that I formally and informally assess my students. One important tool that I always use is reading surveys. I encourage my students to be honest when filling these out. With that reminder, I find very honest responses. Many of my students write about not reading at home, not liking reading, feeling bored when they read or having some sort of negative experience with reading in a previous grade.
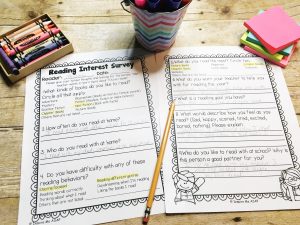
(The reading surveys are part of my Reading Workshop Unit: Reading is Thinking)
With all of this information gathered…I am ready for step number 2.
Step 2: Group your readers
Now that you know more about your students reading levels, abilities, likes/dislikes, and behaviors, you can begin to create flexible reading groups. Traditional guided reading groups focus on grouping students according to their instructional reading level. I find my students’ instructional reading level by the results of the Fountas and Pinnell test results.
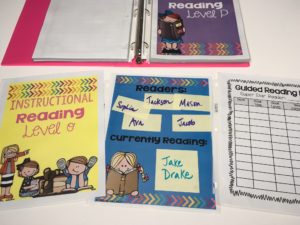
Not only do I create groups based on my students’ reading level, but I also create reading strategy groups. After reading my students reading surveys, I also group my students according to their reading goals. I look for patterns of students who share the same goal- wanting to read more at home, wanting to stay focused, etc.
There are many different ways that I display my groups on a bulletin board, however, that is a completely optional part of the process.
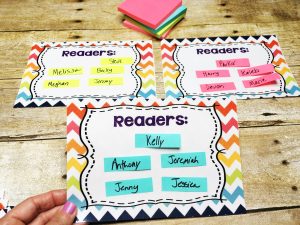
One idea is in the picture below. The bulletin board poster is labeled “guided reading groups.” I then post the pictures of the students who I am reading with on the board. You can also put their names on a sticky note and easily make the reading groups flexible by simply switching their name to a new group.
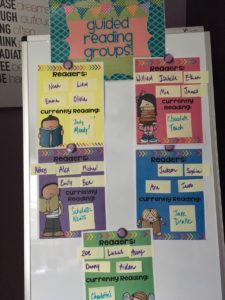
You can read more about how to create flexible reading groups by clicking here: Creating and Scheduling Guided Reading Groups
Step 3: Create a guided reading schedule
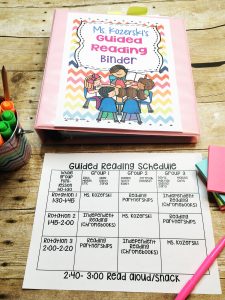
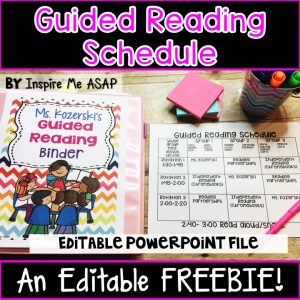
This is the step where you create a visual plan for how often you will meet with your groups. My guided reading schedule changes EVERY YEAR. Depending on the needs of my students, if I am working with a co-teacher or a reading interventionists, I always have to adapt my schedule at the beginning of the year. (I also still tweak my schedule throughout the year, since my groups are flexible and constantly changing.) In this example, a teacher meets with every student every day. Now, I know that it seems like that is intense, and it is!, however, this year I only have 18 students AND I am the cotaught room. I also have two reading interventionists work with a handful of my students. So when I say that every student meets with a teacher every day, it may or may not be me. I always begin my reading instruction with the core lesson, which all students are present for. Students can’t be pulled from this time. I teach the whole-group mini-lesson and then we break off into our rotations. (Want to learn more about my reading mini-lessons? Click here –> Reading Workshop Mini-lessson Musts
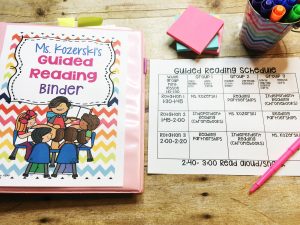
I am the first person to admit that although this looks great on a piece of paper….things come up and sometimes meeting with the groups I intended to does not happen. For example, last week I had RTI meetings and a fire drill for three out of the five days. Unfortunately, this cuts into my guided reading time.
When I meet with my students in a guided reading group, I make sure to do at least ONE running record for every group. I do not skip this. I really try hard to hold myself accountable so that I can keep on track with assessing all my readers.
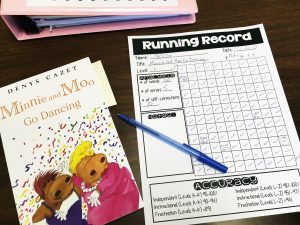
I will write more in-depth about running records will be in an upcoming blog post about assessment in guided reading. Stay tuned!
In the meantime, get your copy of the editable guided reading schedule by clicking on the button below:
Step 4: Plan your guided reading lessons
I could write a weeks worth of posts on this topic…but for the purpose of this blog post, planning what you will teach in each group is your next step. One book that I highly recommend is Fountas and Pinnell’s The Continuum of Literacy Learning. I use this book as a reference for all of my guided reading groups. There are ample ideas for word work, reading behaviors and strategies for every reading level A-Z. I also refer to this book during my parent-teacher conferences. It helps the parents see a more in-depth description of their child’s reading behaviors at their instructional reading level. The book is broken into sections to demonstrate thinking within, beyond, and about the text.
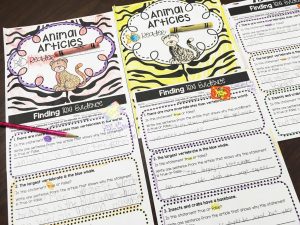
I also create lessons based on many of the guided reading passages that I created. The picture below shows non-fiction reading passages and comprehension questions, from my guided reading passages about animals, written at a level N. With this particular group of students, I wanted to focus on finding text evidence to answer questions. I like using a hard copy of a text, where my students can mark up the page by highlighting the answers to the comprehension questions.
I also use these articles to teach different non-fiction text features- captions, headings, subheadings, and important words in special types of print (bold, italics). I also use these articles to teach about the main idea and supporting details, identifying key details and identifying important vocabulary/content words.
You can download a FREEBIE of my animal articles by clicking here—> Animal Article FREEBIE, or clicking on the button below:
Step 5: Teach your readers about guided reading group expectations
Depending on the grade that you teach and previous experience. Even though I teach 2nd grade, I find that I still have to teach my students about the expectations during a guided reading lesson. I always *CRINGE* when I meet with a new group of students and they automatically start to chorally read the text. No! Choral reading, or round-robin reading, is NOT guided reading. (Want to learn more about what guided reading looks like and sounds like? Read my first blog post-> Introduction to Guided Reading ) I also like my students to know that I also have a job during this time. I am constantly writing down anecdotal notes in my guided reading binder. I don’t want my students to be worried about what I am doing. I want them to be assured that I am writing observations about what I notice about them as readers.
One of the best ways that I have found to teach the expectations is to use hula hoops to create a “teacher,” “student,” and “both” Venn diagram.
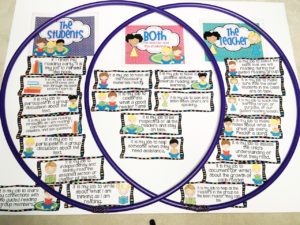
After we do this interactive lesson, I like to take a picture of the Venn Diagram and then post it as an anchor chart for a nice visual reminder. If you are interested in purchasing the guided reading Venn diagram, you can click HERE. (You can purchase it separately or as part of the GR binder.)
Step 6: Teach your readers about what they do when they are not reading with the teacher
I use a reading workshop approach for my reading instruction. This means that I teach a mini-lesson to the whole group, the students begin their independent reading, and then we have closing as a whole group. When my students are reading independently, I then meet with groups and hold individual reading conferences. It takes a solid six weeks (more or less depending on the students) to implement reader’s workshop at the beginning of a new school year. However, this time is well spent and sets the tone for the rest of the year.
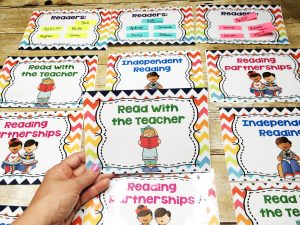
In the picture below, you see the different rotations for my students. In this example, a teacher (myself, my co-teacher, the reading interventionists, ect.) meets with each student every day. Students have three daily rotations: read with a teacher, independent reading, and reading partnerships. Research indicates that students become better readers by READING. Not doing busy work worksheets with reading skills, but real reading. Research indicates that to make adequate growth, students need to read at least 30 minutes every day. For this important reason, I do not have my students do “centers.” They are either reading with me, their reading partner, or by themselves.
Want to learn more about my reading workshop approach to teaching reading? If so, check out my blog post series about implementing reading workshop into your classroom, starting here: Introduction to Reader’s Workshop
In addition to these steps, there are other important things that I do for guided reading implementation at the beginning of every school year. I always make sure to communicate data with parents and also start to track my data and anecdotal notes.
Want to keep learning more about how to implement guided reading into your primary classroom?? On August 8, 2016, I posted a video on my Facebook page about implementing guided reading in a primary classroom at the beginning of the new school year. You can view this video by clicking HERE or by clicking on the image below. Be sure to subscribe to me on YouTube so that you do not miss any of my other videos!
This video gives 6 specific and detailed steps to take when implementing guided reading into your primary classroom at the beginning of a new school year. (The video starts off sideways for a few minutes–but then returns to normal.) This is a 40-minute detailed video to watch now or save for later! I also typed up a summary of my video on this blog post, which includes the links for all the resources that I included in my guided reading video.
Looking to learn more about how to implement guided reading in your classroom? Check out these guided reading resources I created below!
First Grade Guided Reading Passages
To buy the first grade GR passages on Teachers Pay Teachers click here: First Grade GR Passages
Save 10% by purchasing the first grade GR passages on my website by clicking here: First Grade GR Passages
Second Grade Guided Reading Passages
To buy the second grade GR passages on Teachers Pay Teachers click here: Second Grade GR Passages
Save 10% by purchasing the second grade GR passages on my website by clicking here: Second Grade GR Passages
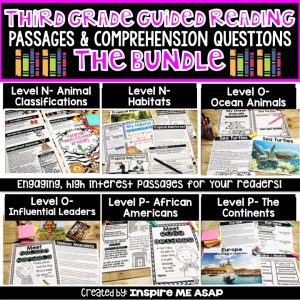
Third Grade Guided Reading Passages
To buy the third grade GR passages on Teachers Pay Teachers click here: Third Grade GR Passages
Save 10% by purchasing the third grade GR passages on my website by clicking here: Third Grade GR Passages
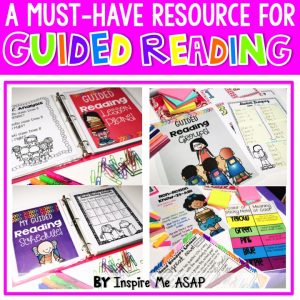
Create your own Guided Reading Teacher Binder:
To buy the Must-Have Guided Reading Resource on Teachers Pay Teachers click here: Guided Reading Binder Bundle
Save 10% by purchasing the Must-Have Guided Reading Resource on my website by clicking here: Guided Reading Binder
Looking to learn more about guided reading? Be sure to check out the guided reading blog post series that I will be writing!
